
Outlook
**For best results please ensure that your version of Outlook is the most up to date version. Outdated versions will not comply with the new server settings and we will be unable to provide sufficient support until Outlook is updated**
Check this Step By Step email client set up
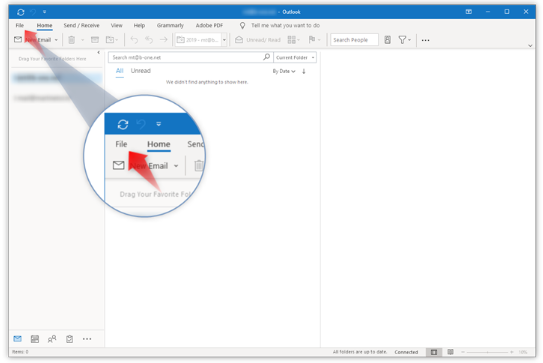
Step 1 - Open Outlook and click File
Open Outlook on your computer and click File in the top left corner.
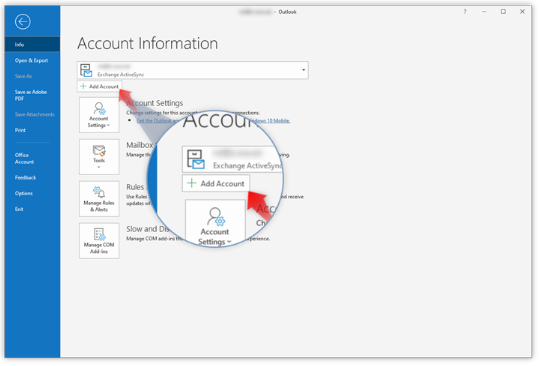
Step 2 - Click Add account
Click Add Account to start setup
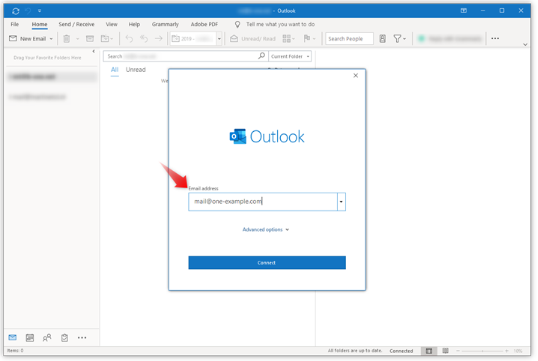
Step 3 - Type in your email address
Type in the email address you want to add and click Connect
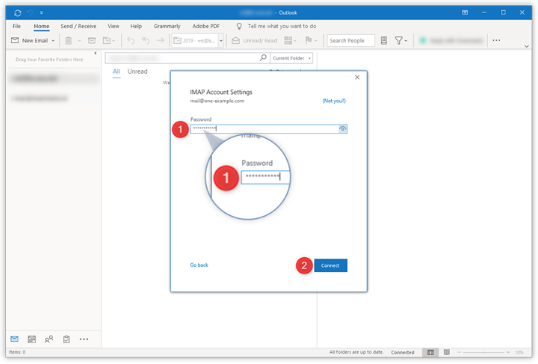
Step 4 - Enter your password
1. Type in your password, it is the password that you also use to log in to Webmail.
2.Click Connect to continue.
Note: If Outlook cannot detect your settings automatically, please select IMAP and then enter the settings below.
- Incoming mail:
mail.yourdomain.com - 993 - SSL/TLS
- Outgoing mail:
mail.yourdomain.com - 465 - SSL/TLS
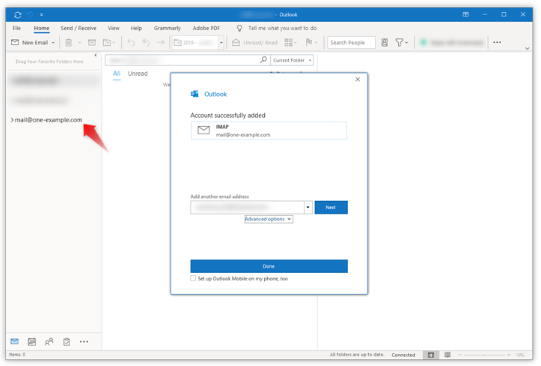
Step 5 - Close automatic setup
Click Done to complete setup.
Step 6 - Go to File again
Your email account is now set up, but you need to add an additional setting to make
sure all emails are delivered to the correct folders

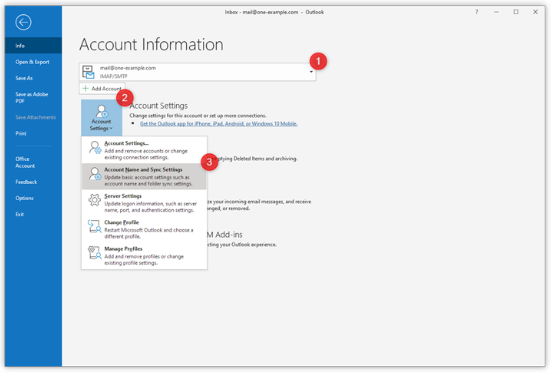
Step 7 - Go to Account Name and Sync Settings
1. Select the email you want to check the settings for in the drop-down bar at the
top of the screen.
2. Click Account Settings3
3. Select Account Name and Sync Settings in the drop-down menu that
appears
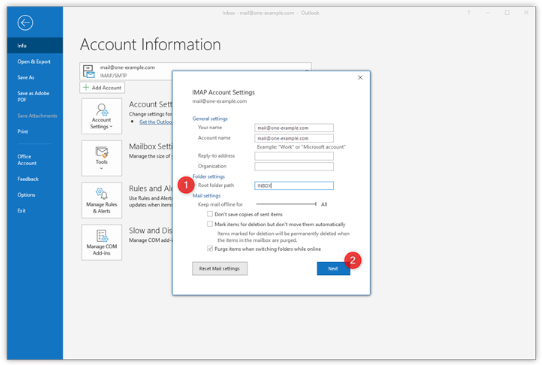
Step 8 - Set the Root folder path
1. Under Folder settings type in INBOX as the Root folder path , all in capitals.
2. Click Next to save your settings
Step 9 - You are done!
Click Done and go to your inbox. Here you can see that all folders are on the same
level as your inbox
To schedule a support session email support@oneelevendigital.com
Comments
0 comments
Please sign in to leave a comment.